Concrete Contractor

Revitalize Your Concrete: A Comprehensive Guide to Repairing and Restoring

Some cracks require a professional’s expertise, such as large, deep, or wide cracks or cracks that compromise the integrity of a building’s foundation, floors, or walls. Other cracks may be repaired by the homeowner using the proper materials.

Concrete Repair

A construction-grade, polyurethane concrete repair sealant. It self-levels to a foot-traffic-ready finish and is moisture-cure. It resists temperature extremes and soil heaving. For professional help, contact Concrete Repair Eau Claire.

Concrete is a marvelous material, but over time it can deteriorate and crack. When this happens, a quick and relatively inexpensive solution is to use self-leveling concrete. The trick is to make sure you are using the product correctly, and that it is appropriate for your situation.

Self-leveling concrete can be used to fill cracks or fill joints in horizontal concrete surfaces, such as driveways, sidewalks, patios, garage floors, and above ground foundations. This type of concrete sealant contains a high-grade polyurethane and has a low VOC content, which makes it environmentally friendly. The sealant is also water resistant and durable, making it ideal for long-term applications.

When applied correctly, the concrete crack filler will not only restore the appearance of your concrete, but it will protect the structural integrity of the slab as well. It can also be painted to match the surrounding color of the concrete. Before applying self-leveling concrete, it is important to ensure that the surface is clean and free of debris. You will also need to make sure that the area is not exposed to heavy foot or vehicular traffic until it dries.

Depending on the brand of concrete sealant you choose, it may have different curing instructions. Some will be ready for use within 12 hours, while others will require up to 48 hours before you can begin to use them. The environment where the self-leveling concrete is being applied will also affect the curing process.

Both concrete caulking and self-leveling concrete are used to seal cracks in concrete surfaces. Concrete caulking is thicker than self-leveling concrete, and it is able to stop moisture from getting into cracks, which can cause the concrete to break down. Concrete caulking can be used to repair small cracks, as well as large cracks in a concrete floor or wall.

Self-leveling concrete caulking is similar to concrete sealant, except it is thinner and more runny. It will not flow through cracks or holes in the concrete, but it can be sprayed on and smoothed with a trowel for a finished look.

Concrete Patching Mix

Concrete patching mixes are a great way to take care of minor cracks and holes before they turn into major problems. When using concrete patching mix, it is important to follow the directions on the label and apply it to a clean surface. It is also important to allow the patching mix to cure properly.

When used correctly, a concrete patching mix can be a cost-effective solution to many common issues with concrete surfaces. If you are experiencing issues with your concrete and would like to learn more about how it can be repaired, reach out to a professional. They can help you decide whether repairing or replacing the concrete is the best option for your home or business.

Concrete patches can be applied to a variety of surfaces, including masonry, concrete, stucco, and even some wood. They are typically easy to use, but some require specialized equipment and technical expertise. A concrete repair company can help you determine which product is right for your needs and provide a professional installation.

This concrete patch is designed to repair cracks and holes up to 1/4″ deep in a wide range of indoor and outdoor concrete, masonry, and stucco surfaces, such as garage floors, sidewalks, patios, and driveways. It can be applied to horizontal or vertical surfaces, and it can be painted or sanded after drying. It is not recommended for areas that will be driven on, however.

This product requires much less water than traditional concrete patch products, and it is ideal for patching small pock marks, spalling, and minor surface damage. It is very easy to use, and it provides a long-lasting, durable repair. It can be applied to vertical or overhead surfaces, and it is available in a variety of colors to match your existing concrete. This product is also low-odor and non-toxic. It is a good choice for residential and commercial applications, and it is available in both powdered and liquid form. It is also available in a convenient kit that includes everything you need to make your repairs. This kit makes it easy to create a professional-looking finish.

Concrete Repair Materials

When it comes to concrete repair, the material used is just as important as the proper preparation of the surface. The right materials can ensure a long-lasting and effective repair. The key is choosing a repair material that’s strong enough to support the design loads, durable to resist the effects of weathering, and economical for both initial cost and ultimate service life.

Cement-based repair materials are widely used for repairing concrete structures, which is attributed to their good compatibility and bonding strength with the existing substrates. Most of them contain Portland cement (PC), sulphoaluminate cement, blast furnace slag or silica fume as binders and aggregates. In addition, the use of fibers and modification with organic materials can enhance the performance of these repair materials.

Proper surface preparation is the linchpin of successful repairs. This includes cleaning, profiling and saturating the substrate to bring it to a “Saturated Surface Dry” state. This is necessary to prevent the absorbed moisture from diluting the repair material or causing weak spots and voids in the repaired surface.

Moisture in the concrete substrate can significantly affect the cement hydration and microstructure of the repair material and influence the interfacial bond property between repair material and old concrete. Courard et al. [78] found that the water content of the substrate affected the moisture transport and influenced the bond strength between a special concrete mortar and the existing concrete.

A variety of methods have been applied to improve the bonding strength between concrete repair materials and the substrates, including sandblasting and the use of polymer-based coupling agents. Moreover, the roughness of the substrate surface can significantly enhance the shear strength of the interfacial bond. A number of studies have investigated the effect of different surface removal techniques on the shear bond strength between the repaired concrete and the substrates, such as slant shear tests and pull-out test. Among the studied methods, sandblasting and the use of the polymer-based coupling agent had a better bond strength than the other tested surfaces. Besides, slant shear tests and the pull-out test have also been used to evaluate the shear bond strength between geopolymer repair mortar and old concretes.

Concrete Repair Contractors

Concrete repair contractors have the expertise and experience to identify the root cause of a concrete problem. They can then use the appropriate remediation techniques to restore a concrete surface or structure to its original condition. This may include crack repair, patching, resurfacing, and concrete strengthening. They can also help protect concrete from future damage by applying protective coatings.

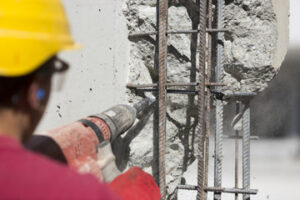
The type of concrete repair required will depend on the type and extent of the damage. In cases where structural integrity is compromised, concrete repair contractors can reinforce the affected area using epoxy injection or carbon fiber reinforcement methods. They can also use concrete leveling to fix uneven surfaces. This is a technique that involves drilling small holes and adding concrete under the damaged section until it is level.

Some examples of repairs that require the expertise of a concrete repair contractor include expansion joints, large cracks, and cracked or spalling concrete. It is important to address these issues as soon as possible, as they can lead to serious problems.

In addition to repairing structural issues, concrete repair contractors can also provide services such as concrete leveling, resurfacing, and joint sealing. These services are essential for maintaining the functionality and beauty of a concrete structure. They can also help prevent future damage by addressing any environmental factors that may be causing it to deteriorate.

A professional concrete repair contractor will have the proper equipment to handle any type of concrete project. They will also have access to high-quality materials that will ensure a quality finish. They will be able to recommend the best products and materials for your specific situation.

Concrete structures are exposed to a wide range of environmental conditions and chemicals that can lead to deterioration and corrosion. If the underlying cause of the damage is not addressed, it can lead to expensive repairs or replacements.

Specialty concrete repair contractors can perform many types of structural repairs including post-tension repair, concrete leveling, concrete resurfacing, carbon and glass fiber reinforcement, structural concrete strengthening using alkaline or cathodic solutions, waterproofing, and cathodic protection. They can repair residential buildings, industrial facilities, water towers, concrete silos, airport runways and taxiways, railroad bridges, DOT bridges, and power plant foundations.

Cleaning Services

How to Clean Window Frames and Sills

Keeping windows clean is an important part of home maintenance. It allows natural light to filter into the house and makes rooms appear larger and brighter.

Window Cleaning

To avoid streaks when washing windows, wipe with a lint-free cloth, such as a chamois or microfiber towel, or even a newspaper. When you finish cleaning the glass, buff away any streaks with a dry, lint-free cloth. Visit Website to learn more.

The frames around windows collect dirt, dust, and grime just as the glass does. To keep your home looking its best, it’s important to clean the frames regularly. To do this, you need a gentle yet potent cleaning solution that will safely remove dirt and residue from the frames without damaging them. Mix equal parts warm water and mild detergent to create the cleaning solution, then use it to wipe down the frames. Be sure to take your time and go over every surface of the frame, paying special attention to nooks and crannies where dirt often accumulates.

If your window frames are particularly dirty, try using a mineral deposit removing cleaner, such as CLR or Bar Keepers Friend. These products break down the oxidation caused by minerals in the water and allow you to scrub away stubborn dirt. If your frames are still dingy after using these products, you may need to use a stainless steel wire brush to scrub off the residue and stains.

Before you begin the actual cleaning process, use a vacuum cleaner with a crevice tool attachment or a cloth to clear out any loose dirt in the window tracks and frames. This will make the job much easier and ensure that the rest of your cleaning will be free from caked on gunk.

Afterwards, spray the track with a mixture of vinegar and water until it is thoroughly saturated. Wait a few minutes to let the vinegar and water react with each other, then use a paper towel to wipe down the entire vertical track from one end to the other. Repeat the process on the bottom track to ensure that you get all the gunk from the corners and grooves of each track.

After you’re done, use a lint-free cloth to dry the track and frame. This will prevent the growth of mold or mildew and also help to avoid unsightly streaks on your windows. To speed up the drying process, it’s a good idea to spray the track with water both before and after you wipe it down.

Clean the Glass

Using a dry lint-free cloth, either a microfiber or a terrycloth rag, wipe the glass from top to bottom. Immediately afterward, use another clean lint-free microfiber cloth to buff away any solution residue and remove streaks. Doing this quickly prevents the cleaning agent from drying and becoming difficult to remove. If you have more than one window to wash, it’s best to work on them in sections rather than all at once.

Avoid using paper towels, old rags or newspapers to clean windows. These materials can scratch or leave black ink smudges on glass surfaces. Instead, invest in reusable microfiber cloths that are super absorbent and washable. Alternatively, you can purchase a squeegee to help get the job done.

If you don’t have a microfiber cloth, a squeegee or a rag that is lint-free, use a soft abrasive sponge to rub the dirt and water off the glass. Then, use a squeegee to wipe the window dry. Be sure to rinse the squeegee between uses to prevent it from leaving behind dirty water marks on your windows.

For stubborn stains, try a mineral deposit remover such as CLR. If this fails, make a paste from water and cleaner that contains oxalic acid such as Zud or Bar Keepers Friend. Apply this to the affected area, let it sit for 15 minutes or so and then rinse it off. This may be necessary on exterior or insulated windows with heavy deposits of calcium or lime.

You can also use a de-ionized water spray or commercial cleanser to wash your windows and doors. This type of water is different from regular tap water and does not contain any ions that attract dirt, so your windows will stay clean longer. If you are cleaning a tall window, consider investing in a water-fed pole that allows you to spray or mop from the ground rather than standing on ladders. This method of washing your windows eliminates the need for chemical sprays that can contaminate the environment and cause toxic fumes. You can find these types of poles online or at some home improvement stores.

Clean the Sills

A window sill collects a lot of residue from the outside environment. A quick wiping down may refresh its appearance, but periodic deep cleaning is necessary for sanitation and to keep it looking like new. Unlike window tracks, a dirty sill will show dirt and dust on its surface and can harbor germs and other pollutants that can affect indoor air quality. For this reason, it is particularly important to keep window sills clean as part of your regular maintenance cleaning.

If you have wood window sills, start by brushing them to remove any loose debris and dirt. Then use a microfiber cloth or duster to wipe them down and make sure you get into all of the nooks and crannies. For stubborn stains, you can use a mild abrasive cleaner. Aluminum window sills are tough enough that water alone should be sufficient, but if you’re having trouble with a hard-water spot or mildew, you can use a gentle commercial cleaner formulated for this type of material.

For moldy window sills, you can try using a mixture of equal parts baking soda and water. Apply the paste to the affected area and let it sit for ten minutes. This will help to dissolve the mold and then you can wipe it away with a damp cloth. For hard-water stains, you can also try a mild solution of bleach and water in a spray bottle. This will kill any germs and prevent mold spores from growing.

Brick window sills should be cleaned the same way as a standard brick surface, although you may need to use a slightly more abrasive method to scrub stubborn stains and build-up. Brick is porous, so it can easily absorb substances from the surrounding environment that can stain and discolor it. For this reason, it is a good idea to thoroughly rinse the sill after cleaning and then wipe it dry with a clean cloth to prevent excess moisture from leading to mold growth.

In addition to being a magnet for dust, dirt, and debris, wood window sills can also become a breeding ground for harmful organisms such as mold and mildew. This is why it’s particularly important to clean them regularly and completely to protect the health of your family and guests.

Clean the Windowsill

The window sill is the structure that holds the glass panes of your windows in place. It is the most visible part of your windows, so it should be cleaned regularly to keep it looking its best. This is an easy task that can be done with a microfiber cloth and cleaning solution or even just vinegar.

Adding this to your regular cleaning routine will help prevent future mold and dirt buildup. To clean the sill, start by removing any larger, loose debris. This includes dust bunnies, dead bugs and twigs. A vacuum cleaner with a crevice tool attachment will work well to get the job done quickly and efficiently.

Next, you will want to remove any mold that has formed on the window sill. For this, you will want to use a solution of equal parts water and hydrogen peroxide (3%) in a spray bottle. This will effectively kill any mold on the surface of your window sill, as it is safe for wood and penetrates porous surfaces to kill any mycelium or spores. After sprinkling the solution on the affected area, let it sit for about 10-15 minutes. Then, using a scrub brush and warm soapy water, gently scrub the area, being sure to pay special attention to any nooks and crannies. Once you are finished, wipe away any leftover soapy residue with a damp microfiber cloth.

If you notice that there is still a lot of gunk stuck to the window track, you may need to put in some more elbow grease. This is where a scrub brush or sponge with a scrubby side comes in handy. This will help remove caked on dirt, which may include bird poop, tree debris or construction dust.

When the track is completely clean, use a lubricant to make it slide easily open and closed. Vinyl tracks can be coated with silicone lubricant, while wooden window tracks should be coated with a high-quality furniture wax.

It’s always a good idea to use non-toxic cleaners, as harsh chemicals may damage your window frames and sills. If you do want to use a commercial product, opt for a wood-safe cleaner like Pinesol. Be careful not to oversaturate the wood, as this can cause it to warp or crack.

Cleaning Services

How To Clean A Gutter Properly

Gutter cleaning is a crucial home maintenance task that can help your roof, siding, and foundation last longer. Follow these Gutter Cleaning Sarasota ideas to make the process more efficient and less messy.

To start, use a plastic bucket with a metal handle. Cut and bend the ends of the handle halves into hook shapes that can be hooked over the edge of the gutter as you work.

gutter cleaning

Use A Ladder

Clean gutters prevent water damage to the roof and walls of a house. While cleaning them can be a dirty and dangerous job, it is important to do it regularly to keep the gutters functioning properly.

The first thing you need to do is choose the right ladder for the job. It needs to be sturdy enough to support your weight and the extra load of tools and gutter-cleaning attachments that you will need to carry up it. It should also be tall enough so that you can reach the areas that are hard to access.

Once you have the right ladder, find a safe place to set it up. Ideally, it should not be leaning against the gutters themselves. Putting the ladder against them can cause the gutters to rust or become warped over time, so it is best to work in another area.

If you cannot do this, then use a ladder stabilizer to ensure that the ladder stays stable while you work. Also, make sure that the ground underneath the ladder is free of rocks and other debris that could cause you to trip.

Start at the top of one gutter and work your way down it, scooping out the gunk with a gutter scoop or other plastic shovel and placing it in a bucket. Then, rinse the gutters with a hose and flush out the downspouts.

Repeat this process until you have cleaned all the gutters on your property. Then, do a final inspection to make sure that there are no leaves or other debris left behind.

Once the gutters and downspouts are completely clean, it is a good idea to test them by pouring water down them. If it is clogged, you will need to use one of the many gutter-cleaning clog removal products on the market or call in a professional to dislodge the blockage. It is a far better and safer option to call in a professional to do this for you, however. Then, you can relax and enjoy a clean gutter that will not be overflowing with mucky by-products next time a storm rolls in.

Scoop Out Debris

If your gutters are clogged with leaves, branches, and other debris, you will need to remove them manually. This is best done from a ladder, and it’s important to use the right type of ladder for your job. A good ladder should be stable and easy to maneuver so that you don’t have to lean too far while you work. It’s also a good idea to have a spotter to help stabilize the ladder and ensure your safety. It’s important to wear gloves while cleaning your gutters, as the debris can be sharp.

Begin by finding the downspout opening and clearing away any large branches or twigs that might pose a clog threat. Next, work your way along the gutters, using a gutter scoop or garden trowel to scrape away the loose debris. You can also use a long paint stir-stick to break up and remove larger dirt clods that are stuck to the gutter. Once the gutter is clear, dump the debris onto a tarp lying on the ground below you. It is also a good idea to have a garbage bag or trash can nearby to collect the debris as you go.

To avoid the risk of falling off a ladder, you should always wear sturdy shoes while working and keep three points of contact on the ladder at all times. Ladder-related falls account for several deaths and injuries every year, so be sure to follow proper ladder safety. If possible, use a four-legged ladder for one-story structures and an extension ladder for taller ones.

Another effective method for gutter cleaning is to vacuum out the entire system with a gutter vac. This will allow you to reach more areas of the gutter and is also much faster than scooping. Be sure to vacuum the downspouts as well, as they can often become clogged with debris like leaves and twigs. Make sure to follow proper safety measures when using a gutter vac, such as wearing a harness and tethering the tool to a secure point in the house.

Fill a Bucket

For more stubborn clogs, you can try using a garden hose to wash away the gunk. Start at the end of the gutter closest to the downspout, and use the hose’s spray nozzle to push water over the debris. This will help to dislodge the blockage and may even reveal leaks in your roof or fascia boards. Be careful not to spray your house shingles, though, as this can cause them to peel or blister.

If you notice that the hose is getting too dirty to work effectively, switch it out for a fresh nozzle. This will help to keep the hose from clogging while still cleaning your gutters. For added convenience, you can also purchase a telescoping gutter cleaning tool that attaches to your hose and can reach down into the gutter. These tools are particularly useful if you live in an area with lots of overhanging trees and have to clean your gutters frequently.

When you’re finished, check the downspout to make sure that it’s free of blockages. It should channel water down and away from your house, not toward it. If it’s not, you should consider installing downspout diverters to ensure that the water is moving away from your home instead of towards it.

Regardless of whether you’re using the hand trowel method or the gutter bucket technique, you’ll need to have some sort of place to collect the gunk that you’re scooping out of the gutters. You can make this job significantly easier by bringing up a bucket to place the debris in, rather than having to constantly move your ladder back and forth to do so.

Ideally, the ladder should have a paint-can shelf or hook that can hold your bucket, so you can just shovel the gunk into it and leave the ladder in position. This will allow you to clean several feet of gutter before having to climb down and reposition the ladder. It’s also a good idea to bring a pair of work gloves and safety glasses so that you don’t accidentally touch any twigs or leaves that are lying on the ground. You should also give power lines a wide berth while you’re working on the roof and ladder, since touching one can send electrical current coursing through your body and cause serious injuries.

Use A Tarp

Clogged gutters are more than just a nuisance; they can cause expensive problems such as fascia board rot, structural damage, and unwelcome insect visitors. The best way to avoid the cost of gutter repair and prevent costly structural damage is by cleaning them regularly.

Scooping out gutter debris seems to be the most efficient method of gutter cleaning, and a bright orange plastic “Gutter Getter” scoop can be purchased at most hardware stores. Gloves are also recommended to protect hands against dirty, rotting leaf debris that often contains bird, pigeon, and squirrel droppings that are ridden with bacteria. Work gloves also protect from the torn metal shards that often plague old gutters, which can poke or cut hands inadvertently.

If a homeowner chooses to use a ladder for cleaning gutters, the best time is usually early in the morning or late afternoon when the sun has had time to dry the roof. It’s important to always be careful while climbing a ladder, and it’s best to never step up past the second-to-last rung. It’s also a good idea to have a spotter to help stabilize the ladder when it’s in position.

While cleaning gutters, it’s important to take the time to inspect them for signs of damage or potential issues that may need to be addressed. For example, if gutters are missing pieces, it’s a good idea to have them replaced. If the gutters are loose, it’s a good idea to tighten the gutter hangers.

Another great time to check the condition of a home’s gutters is during a rainstorm. If the gutters are clogged, it’s important to clean them out before the next storm occurs. This will help prevent water from backing up onto the roof and causing leaks, as well as help prevent water from flowing into areas such as valleys, near chimneys, and heating, ventilation, and air conditioning (HVAC) equipment, which can damage the home.

A clogged gutter is more than just an inconvenience; it can be a serious issue that can cost a homeowner thousands of dollars in repairs. Gutters aren’t just an ugly home feature; they’re designed to protect the structure of a house and prevent expensive damage from pests, mold growth, and water leaks. And, as the saying goes, an ounce of prevention is worth a pound of cure.

Driveways

When it’s Time For a Milling and Asphalt Overlay

Asphalt Driveway is a durable, easy to repair and can add a significant amount of value to your home. However, when a crack or damage becomes extensive, it’s time for a milling and asphalt overlay or a new driveway.

Asphalt Driveway

Asphalt is a mix of cement and coarse mineral aggregate materials, such as sand or crushed stone. Its dark color hides fluid spills, and it’s easier to clean than concrete surfaces.

Asphalt is an economical and durable option for a residential driveway. It has a classic, clean look that complements many styles of homes. However, the cost of an asphalt driveway varies depending on the scope and size of the project. Some contractors may charge a flat fee, while others will have an hourly rate. You should find a contractor you trust, and ask for references before hiring them. It is also important to get a contract that clearly lays out the work and fees to be done.

A new asphalt driveway costs between $7 and $13 per square foot, including installation. The price is higher than a concrete one, but it’s a good investment because it has a longer lifespan. Additionally, it’s easy to maintain and can be repaired with relative ease.

The most significant factor in the cost of an asphalt driveway is the type of base material. The underlying layer must be stable and free of organic materials. A poor base will create sags and cracks in the asphalt, which can lead to early deterioration. To prevent this, use a coarse aggregate such as crushed stone or “conbit” (recycled asphalt and concrete) to provide a firm, settle-resistant matrix.

In addition to the underlying structure, the surface of the asphalt must be constructed to withstand heavy traffic. For this reason, it’s best to hire a professional paving company. The crew can install the driveway faster and at a higher quality than you could on your own. Plus, they have the tools and equipment to get the job done right.

The lifespan of an asphalt driveway depends on how it is used and maintained. To extend its life, you should keep cars and trucks off the driveway to minimize damage. You should also trim trees around the driveway to avoid tree roots crawling underneath the asphalt. You should also regularly seal the driveway to protect it from moisture and sun exposure. A well-maintained asphalt driveway can last 30-40 years. This is much more than the average lifespan of a concrete driveway, which is 20-30 years.

Durability

The lifespan of an asphalt driveway is generally much longer than concrete, depending on the quality of the installation, climate conditions, and usage. This is partially due to the fact that asphalt is more flexible than concrete and can better withstand freezing and thawing cycles. It also typically requires less maintenance than other types of pavement.

It is important to maintain your asphalt driveway to ensure it lasts as long as possible. Regularly blowing or sweeping the surface prevents the build-up of organic materials that can cause cracks and other problems. Additionally, sealing the driveway every few years can help keep it looking new and attractive.

When properly maintained, an asphalt driveway can easily last 30 years or more. However, it is not as durable as a paver driveway, which can withstand up to 40 years with minimal maintenance.

Like any type of pavement, an asphalt driveway can experience damage over time. This is often caused by weather conditions or heavy traffic. If the damage is not repaired immediately, it can lead to large cracks or even potholes. In order to avoid these issues, it is important to work with a reputable contractor and take steps to protect your driveway from damage in the future.

Asphalt is very porous, so it tends to soak up moisture. This can be a problem if you live in an area with frequent rainfall or snow. During rainstorms, water can flash flood the driveway and pick up oils, bits of tire rubber, and other debris. Over time, this can dry out the binders that hold the asphalt together and cause it to crumble.

A good asphalt contractor will use a steel-wheeled roller and a vibrating plate compactor to ensure the material is compacted well. The contractor should also use a tamper or lute to get into the corners and crevices to further compact the edges of the driveway.

Once your asphalt driveway has been paved, it is crucial not to drive on it for the first 72 hours. Vehicles can cause significant damage to the freshly poured asphalt and disrupt the smooth finish. You should also avoid parking any vehicles on your asphalt driveway for up to 14 days after the paving process. Doing so will add extra weight to the fresh asphalt and may leave deep depressions in the driveway that can eventually become cracks.

Maintenance

A well-maintained asphalt surface adds value to a home or business. It also improves curb appeal and enhances safety. It is also less expensive to repair minor damage than to have an entire driveway or parking lot repaved. In addition, a well-maintained driveway or parking lot looks more appealing to potential buyers and is a great way to show that the property owner cares about the condition of their home or business.

Maintenance requirements for asphalt driveways include sweeping, hosing down, and power washing the surface to remove debris. This will prevent dirt, leaves, and other materials from clogging the asphalt and causing premature wear. It is recommended that this be done every month or two to ensure the longevity of the pavement.

It is also important to keep the area free of weeds, which can be abrasive to asphalt. It is best to remove weeds as soon as they appear, because they can cause cracking and separation of the surface layer from the subgrade. Crack filling is another maintenance task that should be performed regularly. This helps to prevent minor cracks from turning into larger crevices that could cause water infiltration and lead to further deterioration of the surface.

Other maintenance tasks for asphalt driveways include checking for drainage problems and removing standing water. It is important to keep the surface dry to prevent damage to the asphalt and the underlying soil. In some cases, a drainage system may need to be installed to help with this problem.

Keeping your asphalt driveway in good condition will not only save money, but it will also increase the overall value of your home or commercial property. It will also make it easier for you to sell your property in the future. A well-maintained asphalt surface is a welcome sight for potential buyers and can give them the confidence that they will enjoy their new home or business for years to come.

In some cases, it may be necessary to hire a professional for maintenance or repair jobs on your asphalt driveway. A paving contractor can provide the expertise needed to get the job done correctly and efficiently. In addition, a professional can usually offer a warranty on their work that will protect your investment.

Appearance

Asphalt driveways are an economical choice for homeowners and business owners who want a durable, attractive paving material. They are easy to maintain and can last for up to 20 years or more if properly cared for. Regular sweeping, removing ice and snow, and applying sealcoat to the surface can prevent cracks and help extend the lifespan of your asphalt driveway.

While many people think of black asphalt as being a plain, boring driveway option, it offers some great options for aesthetics that can add beauty and charm to any home. In addition to the standard, dark black surface, asphalt pavement is available in a wide variety of colors and textures that can add a unique look to your driveway. Its dark color also helps hide oil stains and other spills, which can be problematic for concrete driveways.

The first layer of your asphalt driveway is the binder course. It is a thick, weight-bearing layer that is installed on top of the prepared runner-crush base. This layer is a crucial part of the entire asphalt construction because it provides the strength and durability for the other layers to follow.

The second layer is the wearing course or surface course. This layer is a thinner and smoother version of the binder course and is commonly referred to as the “topping.” Its smaller aggregate pieces make it a nicer surface to drive on and better at shedding water.

A geo-textile fabric is then placed over the wearing course to keep the underlying layer from mixing with the top layer and creating ruts in the driveway. This is a very important step in the overall construction of an asphalt driveway because it helps keep your asphalt looking nice and strong for a long time.

Once the wearing course has been installed, you will begin laying the asphalt concrete. This is a thicker and more dense version of the wearing course that creates a stronger and longer-lasting paving material for your driveway. Once this is laid, you will compact the material and grade it to ensure that it is level.